The Gutenberg Editor has been a major update to WordPress introduced at version 5.0. The purpose is to make WordPress more powerful and easier to use for beginners. In this tutorial, we’ll take a look at:
- A Short History of Gutenberg
- Gutenberg Vs TinyMCE (Classic editor)
- Converting old posts to the new block editor
- How to Add blocks (text, image, and video)
- Live HTML Preview
- How to Add CSS Classes
- How to Navigate Block Headings
- Moving Blocks Around
- Moving the Block Toolbar
- Reusable Blocks
- Adding Shortcodes
- Adding Embeds
- Buttons
- Tables
- Expanding Gutenberg with Plugins
- Keyboard Shortcuts
We’ll even explore a few plugins that allow you to revert to the classic editor if you want.
Let’s get started.
A Short History of Gutenberg
The Gutenberg WordPress editor was introduced to WordPress at the release of version 5.0. From then, it became WordPress’s default method for editing the content on pages and posts. The reasons why it came into being were to simplify the editing process for beginner users and to make WordPress more powerful by incorporating a lot of features similar to visual editor plugins.

That isn’t to say the previous editor wasn’t simple and powerful. It was! As a matter of fact, the previous editor functioned like Microsoft word. But we’ll talk more about that later.
The main improvements are the modular use of blocks and the ability to function like a powerful text editor and a visual editor. The obvious advantage is that you can actually design a page without using a front end editor yet using front end abilities, right out of the box.
To put the benefits in context, let’s do a short comparison of Gutenberg and the classic editor.
Gutenberg vs tiny MCE (classic editor)
| Gutenberg WordPress Editor | TinyMCE WordPress Editor |
| Works with modular blocks of information | Linear (combined) information |
| Functions similar to a drag and drop editor. | Functions similar to a word processor. |
| Creates advanced features without plugins or coding | Plugins or coding needed to create advanced features. |
There are many more differences that we’ll touch on as we explore Gutenberg’s features. And we’ll do so by taking a look at how you can use this new editor to its full ability.
1. Converting old posts to the new block editor
If you have already been writing articles before Gutenberg, then you may want to convert them to blocks in order to access the functionalities of the current editor.

Step 1. Select the three dots on the text toolbar
Step 2. Click convert to blocks. You will see the section broken up into several blocks.
2. How to Add Blocks
Adding a block is done in three ways.

1. By clicking the plus icon below the WordPress toolbar

2. By clicking the plus icon below or above the existing blocks

3. And finally by Pressing Enter while typing in a block.
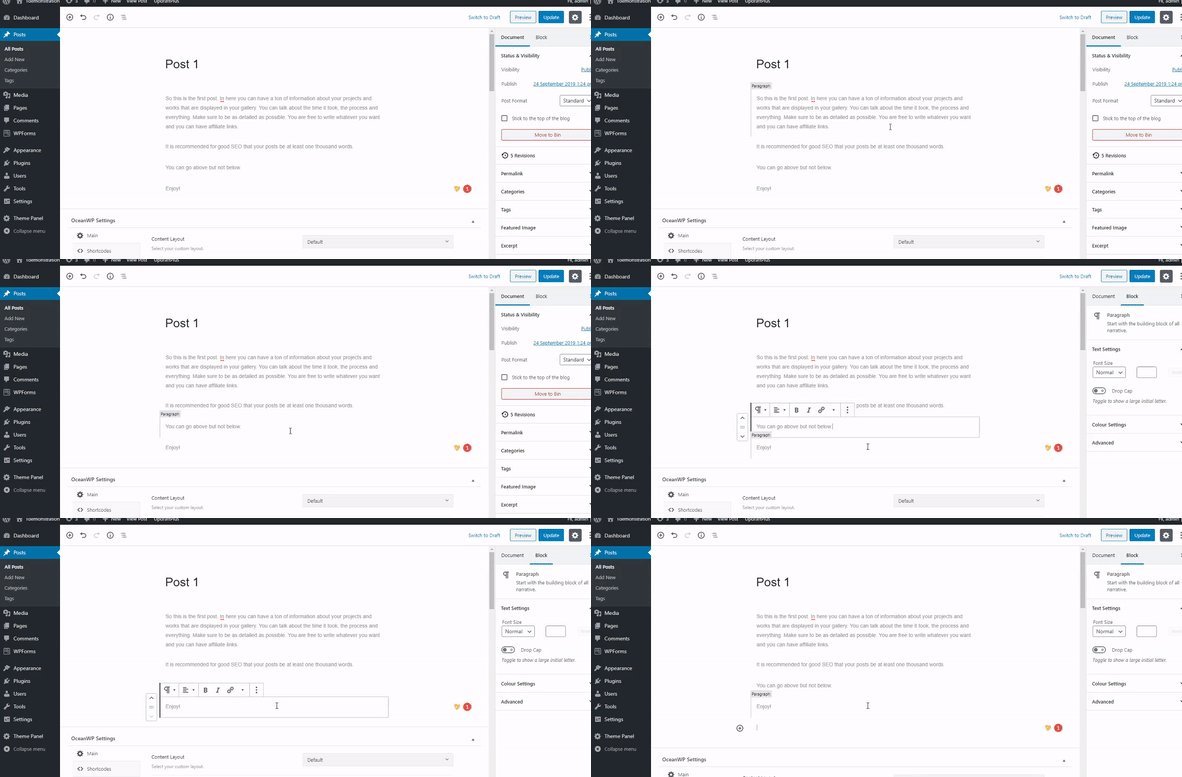
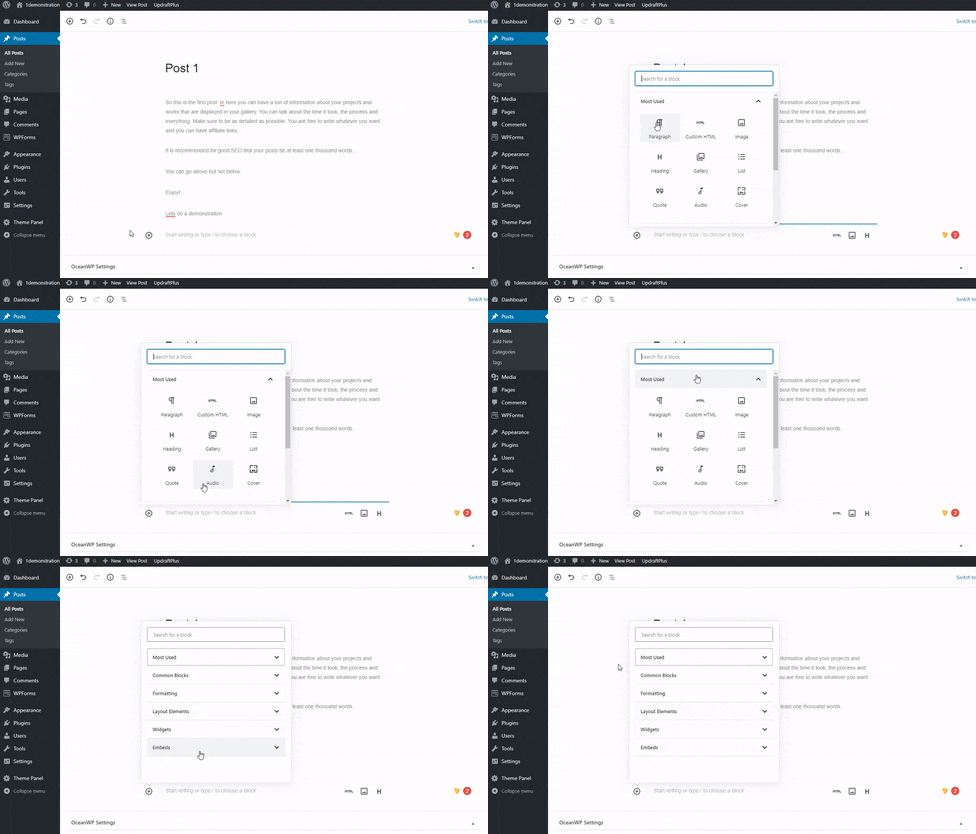
When you create an empty block, click on the plus icon to search for the type of block you want or you can navigate to the one you want to add.

To Add Text – This is the most straightforward thing that you can do with Gutenberg, you just start typing. There are a few things to note though; there are many different text formats to choose from and we’re going to look at how you switch between them.
But first here’s a list of the six different text formats:
- Paragraph
- Headers
- Lists
- Quote
- Verse
- Code
Adding each element is as simple as clicking the plus icon and choosing the desired one.

And this is how you can switch between them.

You can also change the background of the text area and the text color on the sidebar to the right. I’ll show you below.

To Add Images – The concept is the same, once you select the add new block “plus sign” you will just simply choose the type. In this case, you will choose “image“.

Of course, expanding on that you can align the images in different ways by choosing the alignment in the toolbar.

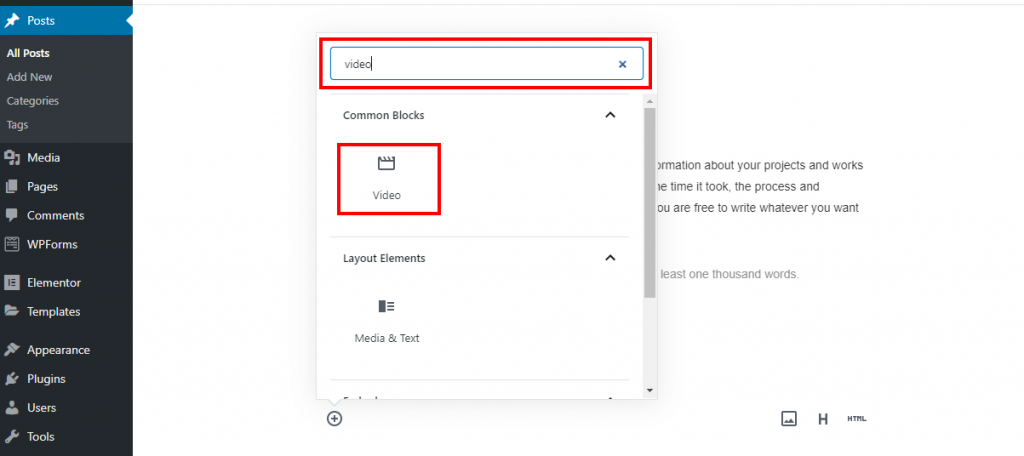
Adding videos– To add videos, you will follow the same narrative as above, however, for external embeds, there is a different process that we’ll discuss later on in this article.

2. Live HTML preview
This feature gives you the chance to edit a single block of HTML code without editing the entire document. The application of this feature enables you to preview the coding changes you make, without switching windows or converting the entire document.
Let’s see how it works.

Awesome right?
3. How to Add CSS classes
One attribute of blocks is the ability to add CSS classes to them; by now you should see blocks as containers. And each container can be given a name or associated with a group.

CSS classes are similar to IDs, but they are used to identify groups of elements instead of single elements.
4. How to Navigate Block headings
Here’s another simple feature of this new editor. Above the page/post below WordPress’s toolbar, there are five options to choose from. Add Block, undo, redo, content structure and block navigation.
Block Navigation allows you to jump to any area in your post, but it doesn’t show you the titles of such areas.
Content Structure is what we’re going to look at. While it doesn’t show you every type of block in your post/page it does allow you to navigate the headers by displaying the titles. See the example below.

This is useful for creating a table of contents and for just jumping around your document when you’re editing.
5. Moving blocks around
Before we go any further it’s important to note how you can place these blocks anywhere you want without copying and pasting. Moving your content is now drag and drop.

Using the navigation arrows for each block you can place the desired block one step up or down. To take it a step further, if you grab the grid icon between the arrows, you are able to move it however many spaces in any direction. The scrolling may be a little glitchy though.
6. Moving the block toolbar.
Before we go into more advanced tips for using this editor. Let’s look at the ways we can move the toolbar around to fit our workspace needs.

Top Toolbar Option puts the block tools in the same area under your WordPress toolbar.
Spotlight Mode allows you to only focus on one block at a time while fading the others in the background.
Fullscreen Mode gets rid of all the sidebars so you can focus on writing in a minimalist setting.
You can enable all three modes at once, or if you like the default set up you can let it stay how it is. By default, none is selected but if you choose one of the options, just click it again to unchoose it.??♂️
7. Reusable Blocks
Look around! Everyone’s trying to conserve including WordPress. And conservation is the main purpose of a reusable block, conserving time, that is. There are many parts on your page that may require similar or redundant content and this is where they come in. Let’s look at how they work.

After you choose “Add to Reusable Blocks” name the block and click save.

In order to access the block, navigate to reusable blocks and select the one you want to use.

It is important to note that when changes are made to the reusable blocks, it is reflected wherever the block is used after the edit. So you may have to create multiple blocks.
8. Adding Shortcodes
Shortcodes allow you to add whole features to parts of your site without the need to learn coding from scratch. They are often generated for different items such as tables, forms, date and time, etc. And they allow such features to be embedded with a small code “id” [normally looking like this].
Step 1. Select the plus icon to choose the blocks you want to add.
Step 2. Navigate to shortcodes and add the block, it’s that simple.

Some shortcodes are built in the themes, like OceamWP while others are generated by plugins. You can also create your own shortcodes, but that’s another post for another time.
9. Adding Embeds
Like shortcodes, this block allows you to place different content in your posts. However, instead of tables and forms, Gutenberg’s embeds allow you to add third-party content such as videos, tweets, images, audio, etc.

Normally, you’d have to use another plugin to have this feature with TinyMCE editor. And alternatively, you can also use this feature with visual editors like Elementor.
You can embed URLs and media from many different sources such as YouTube, Vimeo and Twitter, just to name a few.

10. Buttons
Now, adding buttons is as simple as creating the code in HTML and linking it to the desired URL then styling it with CSS right? Well, that’s one way; the more advanced way is by using PHP and Javascript. And that has its place, but for now, let’s see how Gutenberg simplifies the process.

Similarly to adding any other block, you select the plus sign, then to find the button block, search and select buttons.
When the button is added you can choose the text you want to be displayed. Edit settings such as color, border, link, and radius settings at the right-hand panel and that’s it.
11. Tables
Now, this is similar to how you would add a table with the previous editor. Only using blocks.

By now the process of finding the block should be autonomous; anyways choose the table block and press enter.

Choose the row and column and then select create table.

Now, the basic functions such as align, bold, create links, etc are at the top of the block, that’s not new. What I want to show you above is the column option that allows you to add/delete columns and rows. It took me a while to find that. ?
12. Expanding Gutenberg features with plugins
To put the icing on the cake, there are plugins that add a virtually unlimited number of blocks to Gutenberg when combined. This is extremely beneficial for specific types of sites such as e-commerce sites etc.
We’ve selected three, but there are many different ones to choose from. Have a look and see:
Advanced Gutenberg expands Gutenberg with functions such as:
- WooCommerce product slider and latest product slider
- Map Blocks
- Contact Form Blocks
- Testimonial block
- Social links block
And much more! JoomUnited dedicates itself to adding new blocks every month, basically free updates. They also take feedback on features you’d like to see added.
Getwid provides functions that include:
- Countdown Blocks
- Price list block
- Testimonials block
- Person block – To showcase team members, job titles, etc.
- Advanced headings with access to Google fonts
And of course, many more features that you’d normally get from a premium front end visual composer plugin. They also offer the benefit of building blocks on an “in demand” basis.
Guteblock is developed by a fairly new team of developers and, at the time of this article, some of the features are still in development. But that doesn’t mean it’s not good. Far from it!
Here are some of the features it currently has:
- Author profile block
- Newsletter
- Cards
- Accordion
And up to 16 more, with at least 8 more on the way.
13. Keyboard Shortcuts
Shortcuts are used to improve your workflow; so naturally, Gutenberg doesn’t exclude them. To access your keyboard shortcuts you simple press shift+alt+h and that brings up the shortcuts menu.
- Display these keyboard shortcuts. Shift+Alt+H
Global shortcuts
- Save your changes. Ctrl+S
- Undo your last changes. Ctrl+Z
- Redo your last undo. Ctrl+Shift+Z
- Show or hide the settings sidebar. Ctrl+Shift+,
- Open the block navigation menu. Shift+Alt+O
- Navigate to the next part of the editor. Ctrl+`
- Navigate to the previous part of the editor. Ctrl+Shift+`
- Navigate to the next part of the editor (alternative). Shift+Alt+N
- Navigate to the previous part of the editor (alternative). Shift+Alt+P
- Navigate to the nearest toolbar. Alt+F10
- Switch between Visual Editor and Code Editor. Ctrl+Shift+Alt+M
Selection shortcuts
- Select all text when typing. Press again to select all blocks. Ctrl+A
- Clear selection. Esc
Block shortcuts
- Duplicate the selected block(s). Ctrl+Shift+D
- Remove the selected block(s). Shift+Alt+Z
- Insert a new block before the selected block(s). Ctrl+Alt+T
- Insert a new block after the selected block(s). Ctrl+Alt+Y
- Change the block type after adding a new paragraph. /
Text formatting
- Make the selected text bold. Ctrl+B
- Make the selected text italic. Ctrl+I
- Convert the selected text into a link. Ctrl+K
- Remove a link. Ctrl+Shift+K
- Underline the selected text. Ctrl+U
Of course on a Mac, the shift and ctrl may be different but you should have the idea.
Final thoughts
There are a few things with this new editor, for example, it doesn’t function well with a few themes. That said, it is because it is still under development by the WordPress team. If you want, you can revert to the classic editor using plugins such as Disable Gutenberg and Classic Editor. And you’ll get to use the classic editor until it’s no longer supported in 2022.
Until the classic editor is no longer supported, the choice is yours.
If you need help managing your website, reach out to Sitepact for professional WordPress Maintenance Services. Unlike the classic editor, you can use us for as long as you want. ?

